YOU GUYS. This post has been literal years in the making!! I am dishing everything you could want to know about our DIY Raw Hardwood floors!!
When we decided to use straight from the lumber yard basic 3/4″ maple as flooring in the Merc it did a few things. 1. It gave us unlimited options for patterns (yay!!) 2. It unleashed a million opinions from concerned readers.
I don’t think that it was so much the type of wood/technique we were using as it was the fact that we were leaving them COMPLETELY RAW.
If you’re new, you might have gasped. It’s cool, we’re used to it.
See I kind of have this weird thing that makes me ask why. Like, why are things are the way they are? For example, why do we pay $$$$ for perfectly distressed wood floors that look like they’ve been around for a hundred years and then make them indestructible?
In my mind, the magic of patina is the life that it bears witness of.
I get that this is a super unpopular opinion but it’s the exact reason that we decided to do completely raw floors in our house. I wanted to see what would happen if we just left them open to the elements of living. And that is exactly what we did.
So let’s get into it!
For those that are new, here is a 15 second recap of our renovation situation. Time me!
3 years ago we bought a 100 yr old Mercantile store (the Merc as the locals call it) It was in complete disrepair and needed SO MUCH LOVE.
Like SO MUCH.
We spent almost a year renovating 1/2 of the 4200 sq/ft aka Phase 1 and moved in. That was almost 2 years ago (where has the time gone!?) I wanted to keep it as true to the time period as I could handle, so we did lots of traditional finishes and accents, with my signature out of the box style mixed in. We are starting the second half of the renovation in the next few months, and feeling VERY excited about it. You can get completely caught up from the beginning here.
Phew. Did I make it?
So back to the floors. It just felt really gross(?) to put in laminate or engineered flooring. There is something so special about an old building like the Merc, like the energy and life from all of those years are part of it. From the old brick to the un-level floors, to the original windows, everything showed signs of life in the most authentic way. I wanted to embrace it, ya know?
And because this is literally our job, I thought meh, if it’s a horrible idea it wont be that big of a deal to change them out.
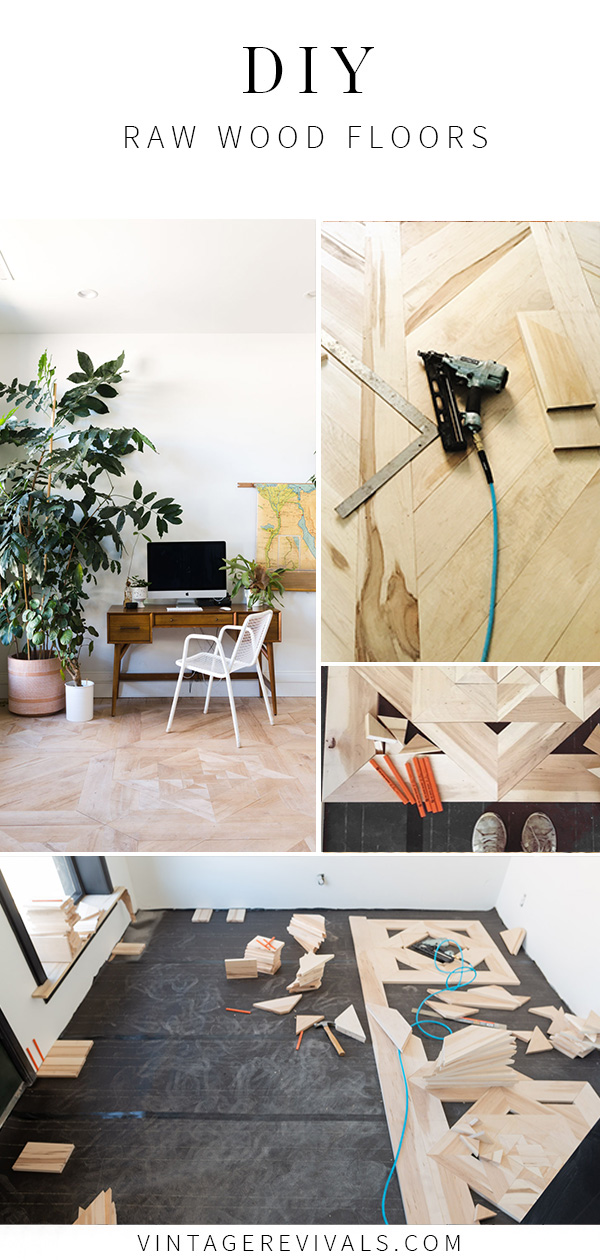
Using The Right Kind of Wood
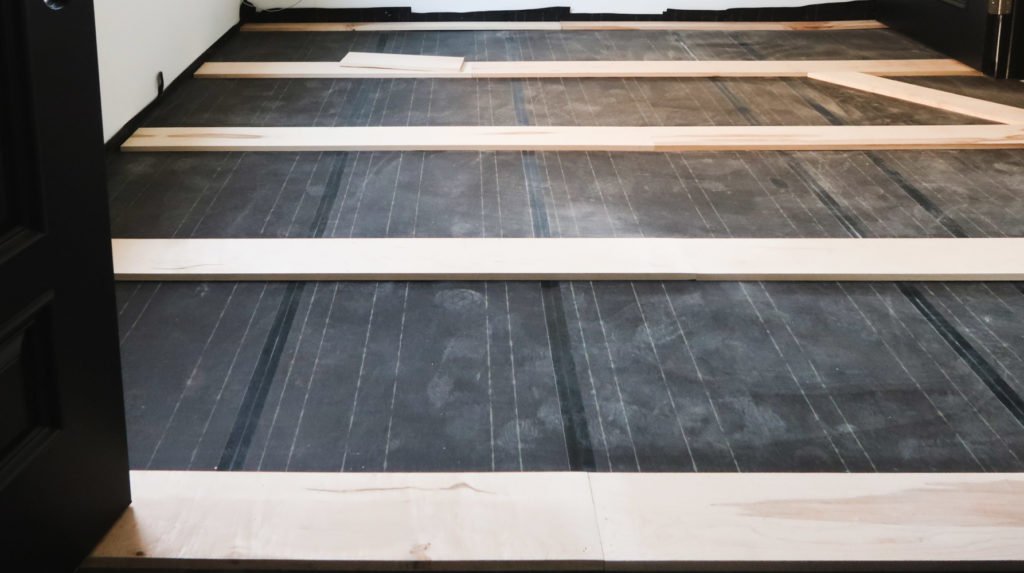
We ordered 3/4 solid maple boards from the lumber yard, had our awesome friend with a woodshop full of tools straighten them, cut them to a 6″ width and plane them nice and smooth. It was one of the best choices in the whole world to not take that on ourselves.
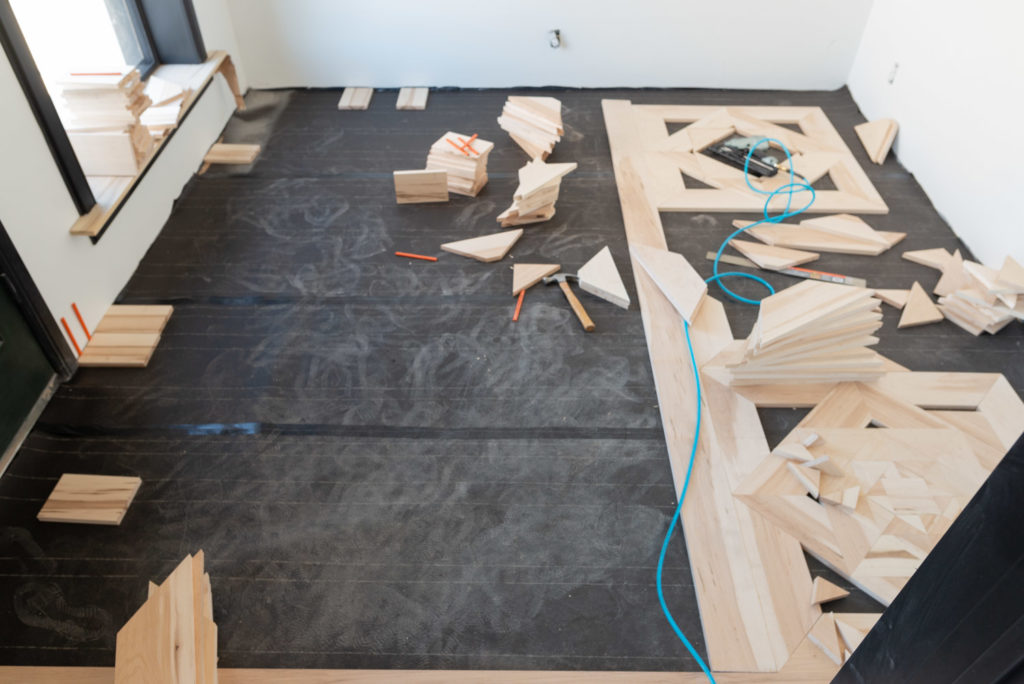
The reason I chose to use maple is because we did a project similar to this 6 years ago with our vintage trailer The Nugget. The $80 floor DIY was one of my favorite projects of the whole renovation and it taught us a lot. Most importantly, not to use a soft wood like pine for a project like this. (For something that doesnt get as much use like a trailer pine is fine, but it has a tendency to splinter and dent easily, which can cause more splintering.) For a floor in your house that gets walked on every day, having hard wood is a big deal!
Maple is one of the hardest woods available. I love it’s soft warm color and light grain, if you’ve been kickin around Vintage Revivals for any length of time, you know this is truuuuue!
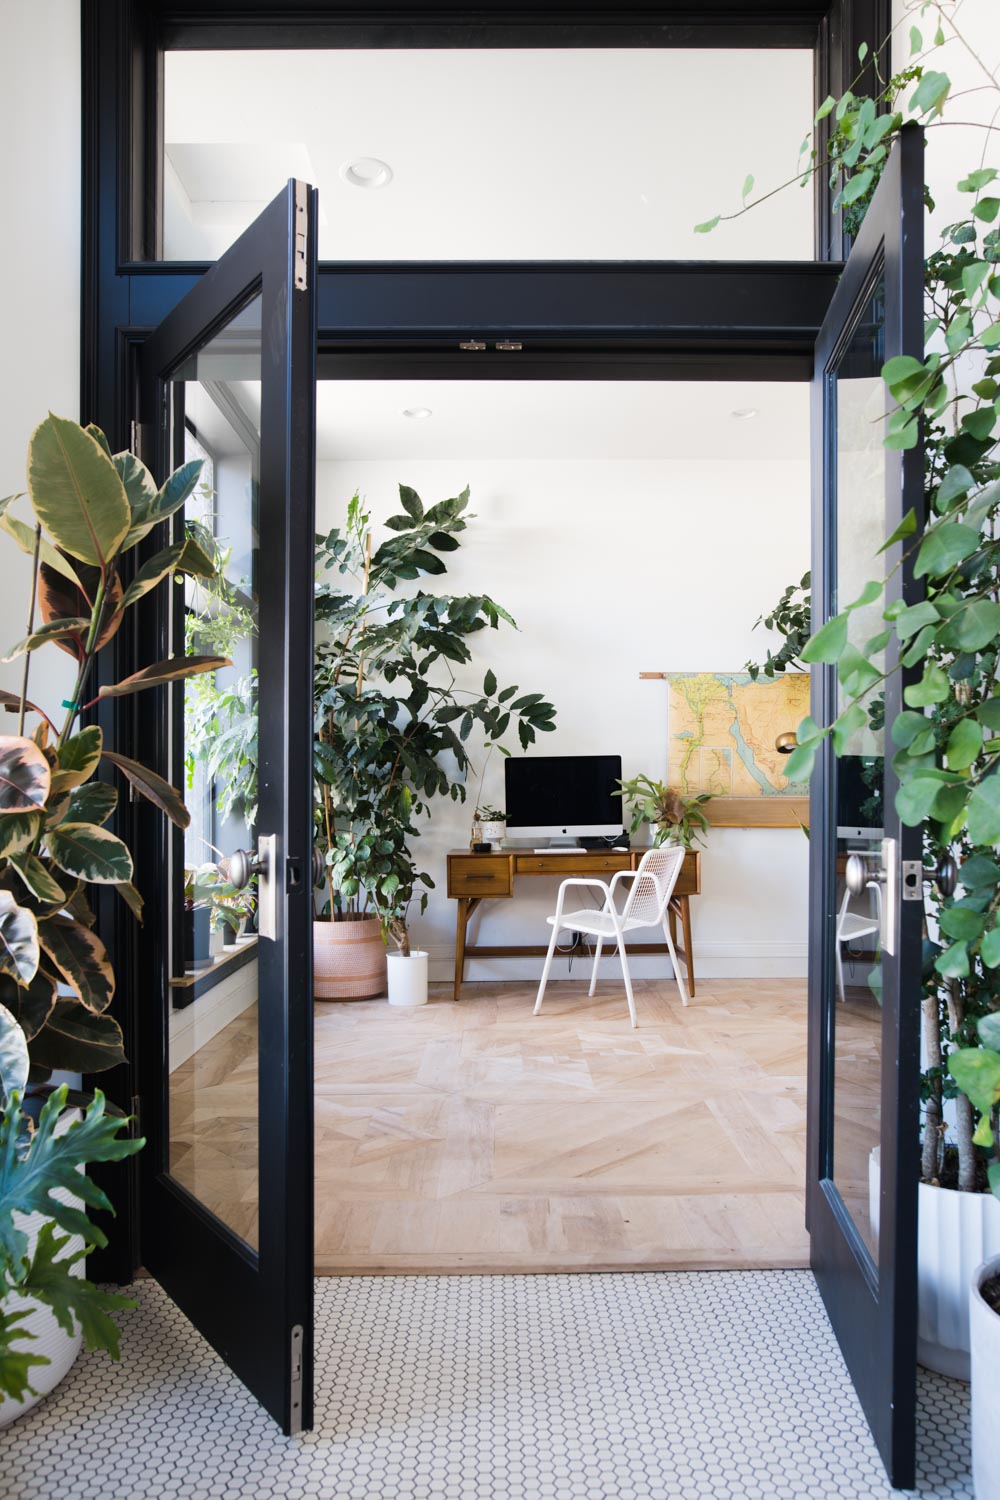
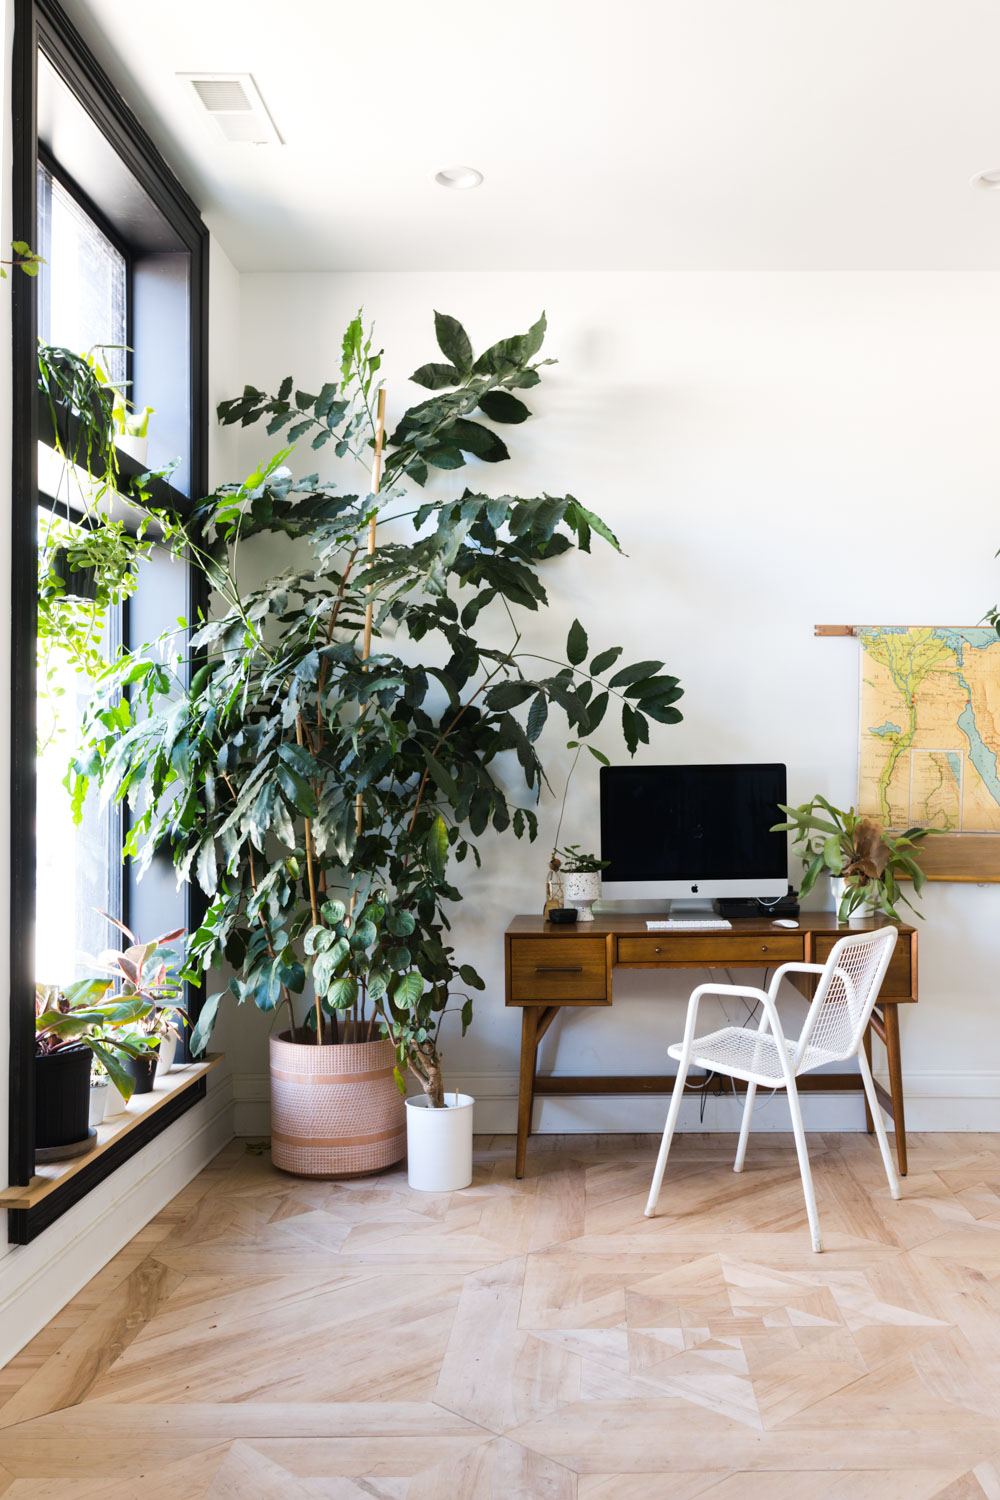
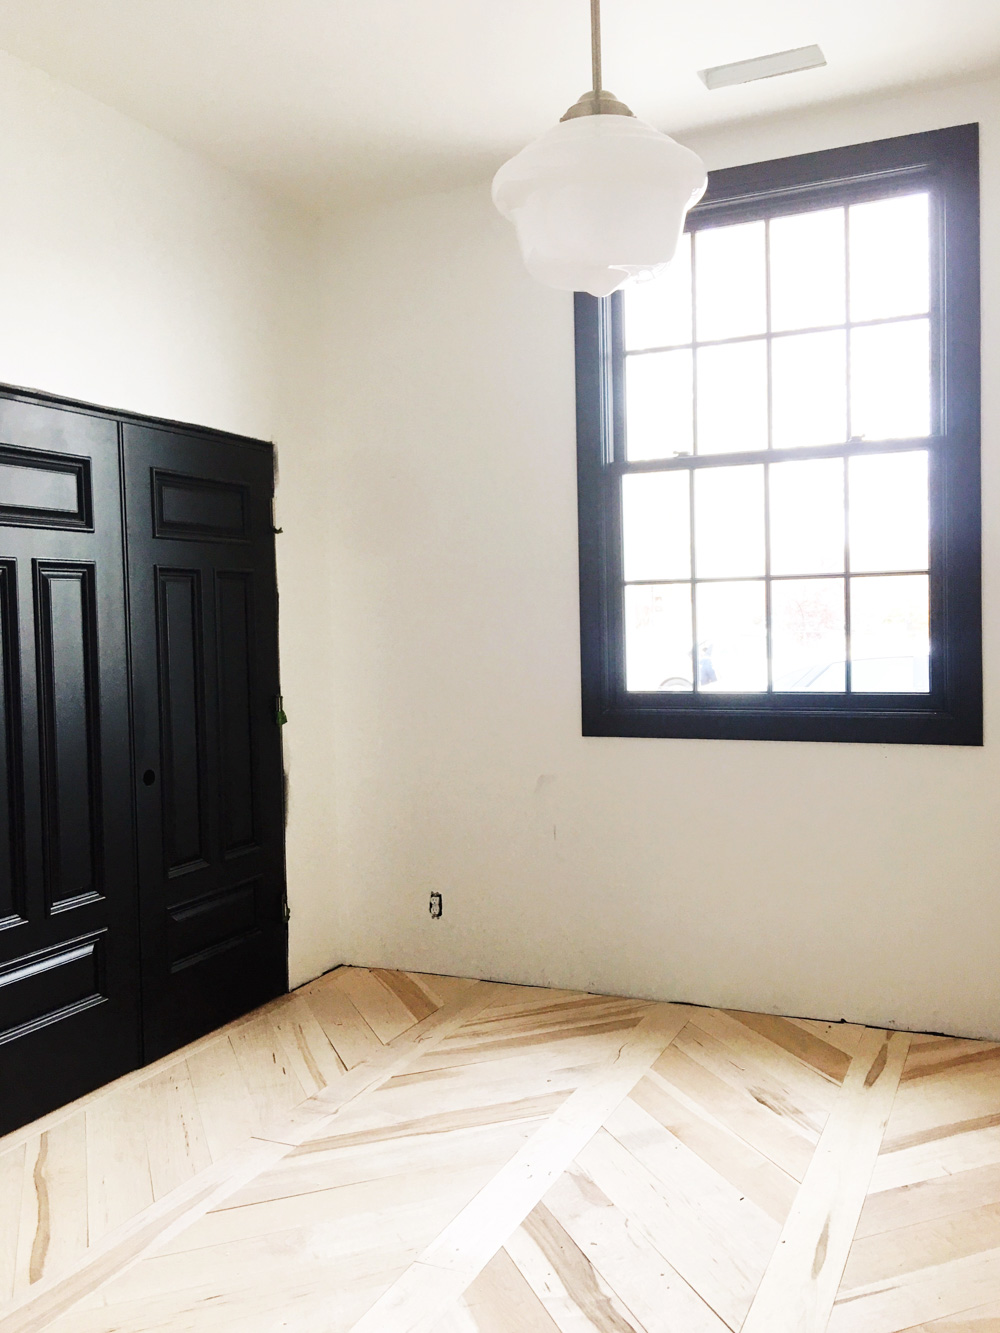
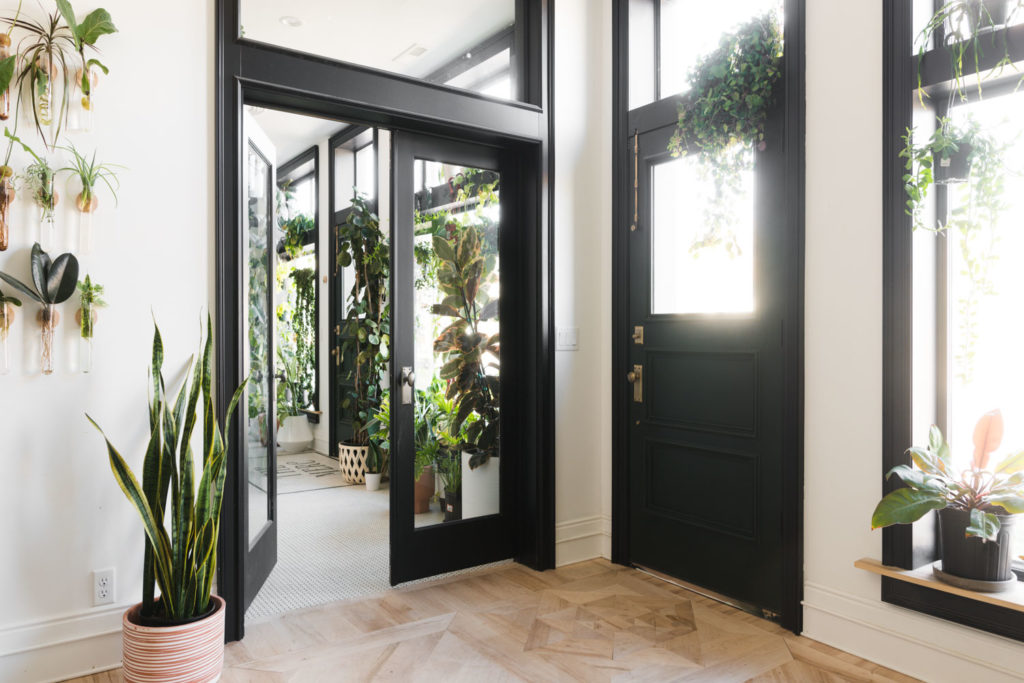
We used it on 4 floors in the Merc (3 bedrooms, and my office) each space has a different pattern and is like a special snowflake.
How are they doing?
I absolutely 100% no hesitation would do it again. I LOVE them.
They are exactly what I pictured when I dreamed this project up. We havent really taken any special liberties when it comes to the way we treat them. The spots that have really high traffic have a little bit of a sheen to them and there was an incident with black paint water that was spilled that needed to be sanded, but man I just cant get enough of them!
Do they look perfect?
Nope. There are spots where the grain in the wood changes direction and it tends to look grayer/dirtier there (maybe if we sanded them in those spots it would be different?) But I’m not mad in the least. It always makes me feel better to know that if we need to we can just sand the whole thing smooth and put a sealer on it, but for now I am feeling great about it.
Are Raw Wood Floors Right for Everyone?
That’s a no from me dawg. I LOVE ours, but I also dont stress about a lot of stuff. If you do, these arent the floors for you. They dont scratch or dent (even in places like my office where the chair is always in the same spot) but stuff can/will stain them.
Would We Ever Clear Coat/Seal Them?
Right now, I would say no. But if you want to do this DIY and seal them, I would recommend a product like Rubio Monocoat. It’s liquid so it will fill all of the gaps, as well as add protection to the surface.
How Do I Clean Raw Wood Floors?
I spot treat a lot, like if something is spilled, or a coloring project gets out of hand. I love using Magic Erasers, and a damp microfiber cloth. For spots that need some more TLC (like the spilled paint or something that doesnt come up with a spot treatment) we’ve been known to pull out the sander.
Do They Splinter?
Maple is such a hard wood that we have had ZERO like literally zero splintering. Not one sliver. If you use a softer wood I bet that can happen easier, you might be pulling out the sander more frequently.
Have any other questions? Leave them below and I’ll update this post!
The post DIY Raw Hardwood Floors appeared first on Vintage Revivals.
from Vintage Revivals https://vintagerevivals.com/diy-raw-hardwood-floors/
from
https://summerblakeley.wordpress.com/2020/02/28/diy-raw-hardwood-floors/
No comments:
Post a Comment